
Military Buildings
The five buildings that make and equip your army.
Barracks
 Barracks
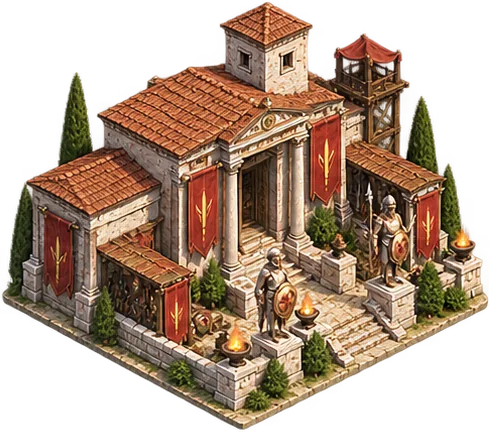
Your whole land army comes out of here. It does two things: it UNLOCKS units — each one wants a Barracks level — and it speeds their training up. Which unit arrives at which level is in the unit tables.
It has no last level: every level cuts training time a little more. Past level thirty the gain gets smaller, but no level is wasted. It works under siege too: a soldier you train in a besieged city joins the garrison by itself at the next round boundary. That is the strongest move a defender has.
Siege Workshop
 Siege Workshop
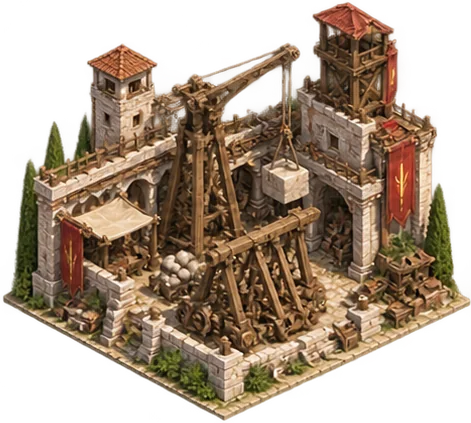
Where siege engines and the Engineer are built. Like the Barracks it both unlocks and speeds up, and like the Barracks it has no last level. Mechanics opens the workshop. Siegecraft in turn needs the workshop itself, so the road to the battering ram runs Mechanics, the workshop, then Siegecraft.
The load cart is built here too. A cart is a vehicle — it does not fight, it carries — and it is what brings a raid's plunder home; it also carries your goods between your cities on the same island. It is made beside the ram, in the same queue.
It also turns out STONES for a defence: when your city is besieged it gives your garrison's engines some shot every round. A city with no Siege Workshop cannot feed the engines standing in its own line.
Port
 Port
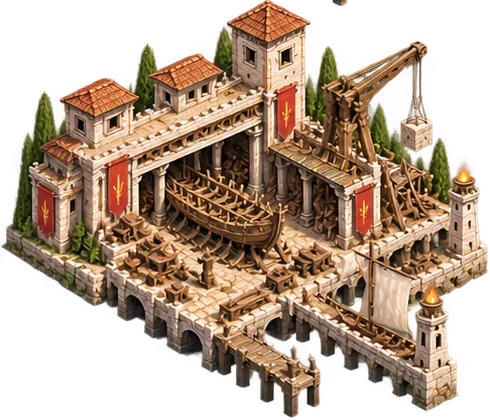
Stands on the trading-harbour plot and builds transport ships; its level speeds shipbuilding up. Once the Port is high enough it also builds a bigger ship, the Holkas.
Transports serve both trade and war: to send an army across water you need hulls to carry it. A single Helepolis fills a hull on its own. The game works out how many ships an expedition needs; on a raid you may add extra ships for the plunder. Ships out with a shipment, a colony expedition or another army do not count as in port meanwhile.
Every transport ship belongs to the Port of the city that built it; that city's shipments, market pickups, colonies and expeditions sail on these ships. To use ships in another of your cities, click that city and send them there with Send a fleet: they can go empty or carry a cargo, and they stay in that city's Port when they arrive. → Moving ships to another city
Transports carry resources as well: you can send goods from one of your cities to another city — your own or somebody else's. The recipient's approval is not needed and the road takes time; the goods leave the departing city's store the moment you give the order, and whatever does not fit in the recipient's store is lost.
The Port also sets loading capacity: a shipment, a gift or a colony expedition is put aboard at the Port before it sails, and the bigger the Port the sooner it goes. Shipments leaving the same city share that capacity. It speeds departures only: cargo arriving does not wait at the recipient’s port. The Quay section of the Port's window shows the shipment being loaded now and those waiting behind it. From there you can stop a shipment that is loading or waiting its turn with Cancel the voyage: it has not put to sea, so the ships and the cargo are home at once and those behind it move up. An army bound for the pirate cove from a city with no War Harbour boards at this quay too, and the list shows it with its soldiers and galleys; if the city has a War Harbour, the soldiers board there and the Quay says so. The moment the Port goes up a level, the loads on the quay speed up. An army going aboard keeps its departure time: the cargo behind it starts loading when the army sails.
War Harbour
 War Harbour
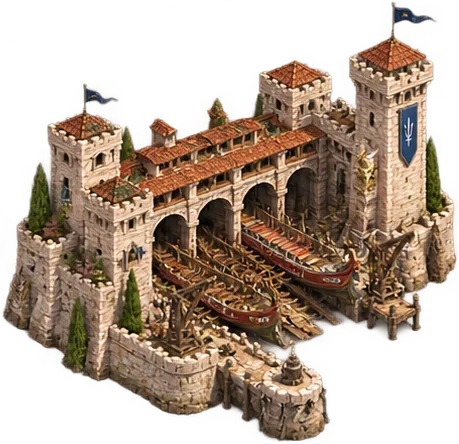
Stands on the war-harbour plot. It has no last level; each level speeds warship building and raises military embarkation capacity. As at the Barracks, the gain in building speed gets smaller past level thirty.
An army bound for another island boards ship here before it sets out. The bigger the War Harbour the faster it boards, and armies sailing from the same city share that capacity. A city with no War Harbour cannot send an army overseas. Ships are built at the Port, but soldiers board them here; an army marching on a target on the same island never calls at a harbour and sets out the moment you give the order. Armies queue for boarding separately from the cargo loading at the Port. The Quay section of the War Harbour's window shows the army boarding now and those waiting behind it: the order, the target, the soldiers, the galleys, and when each sails and lands. Enlarging the War Harbour makes later armies board faster; an army already boarding keeps its departure time. An army you recall while it boards gives up its place on the quay, though: those waiting behind it move up by the time freed and sail sooner. An army overseas also boards again on the enemy shore before it sails home, at the rate your War Harbour had the day it set out — never the enemy's harbour. Enlarging your War Harbour later does not speed up the return of an expedition already under way. There is no queue on the enemy shore; each army boards its own ships. Nothing waits on arrival, at the target or at home.
Warships are built here too. A warship neither marches nor boards: it sails under its own keel and is sent out as a fleet. A fleet can also stay in a harbour it has won and hold it.
An honest note: what the sea still lacks is blockades on the open sea, capturing transport ships, and using a held harbour as a base for expeditions on land. Your allies’ fleets, on the other hand, can lie in your harbour and defend it alongside you (Alliances).
Arsenal
 Arsenal
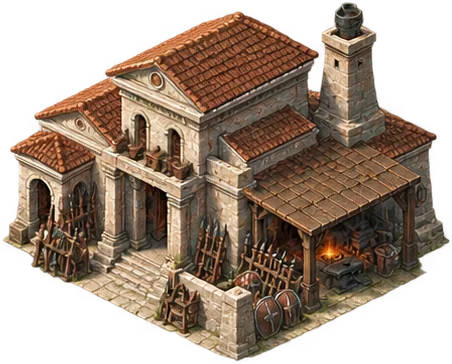
The Arsenal builds no units: it improves your troops' equipment. Every unit type has its own two standards, Weapons (attack) and Protection (defence), raised separately; raising the Hoplite's Weapons does not strengthen the Archer. The standard belongs to the PLAYER: pay once, and every unit of that type, in every city and every one you train later, fights with it. This covers soldiers, siege engines and warships alike; only the two upgrades carry different names for engines and ships. Support units are the exception: they are never targeted in battle, so the Arsenal does not equip them.
Equipment levels are unlimited but the effect is bounded: the cumulative bonus approaches a ceiling and never reaches it, while the price grows with the square of the level. High levels buy identity rather than strength — and every preview states the gain beside the price.
The building's role is a CEILING: an improvement may not out-level the Arsenal it is started in. Once the Arsenal reaches level twenty that limit lifts. It also turns out arrows, shot and bolts every round if its city is besieged — this building decides how long your archers can keep shooting.
More than one Arsenal
You can build an Arsenal in every city, but all of them share one queue: while an improvement is under way, none of them can start another. There is one queue because what you improve is your empire's standard, not a city's.
Whichever Arsenal you start an improvement in sets its ceiling at that Arsenal's level, and its wood and iron come from that city's store, while Knowledge and Gold come from the empire's common purse. So for standards only your tallest Arsenal matters: raising a shorter one opens a level the tallest already allows, never a new one.
Your other Arsenals are there for their own cities' defence. Each Arsenal, if its city is besieged, turns out arrows, shot and bolts for the defenders every round, more with every level; it does nothing for any other city. A second Arsenal is for defending that city, and raising it pays off in the city you expect to be besieged. How much it makes is in the ammunition article.
The Arsenal's window
What does the Arsenal do? in the head of the window that opens when you click the Arsenal explains the building in a few sentences. The tabs below it sort your units by kind — land, siege and ships — and each tab says how many units of that kind are ready to improve. Under every ready unit stand its two standards: the level, what it is worth today and what the next level makes it, the price and the time, with Improve beside them. The Arsenal works on one improvement at a time; the line being worked on counts down, and the other buttons stay off until it is done. A line that waits for another reason says why underneath: the Arsenal has to rise, or exactly what is short and by how much.
The lines under the tabs say where this Arsenal stands in your empire: how many shots' worth of ammunition it makes for the defenders every round if its city is besieged, and what that becomes at the next level; if an improvement is under way at an Arsenal in another city, which city; and if this is not your tallest Arsenal, in which city and at what level the Arsenal that sets the ceiling of your standards stands.
Units you cannot improve yet are gathered under Not improvable yet; open it to see which research each one waits for and whether you have built one. When a kind has nothing ready, the window says so and the list opens by itself. The building itself is at the bottom: What does it bring? shows how many more shots the next level adds every siege round and, if this is your tallest Arsenal, how high it raises the highest standard. Lowering or demolishing the building never takes away the standards you have reached, but this Arsenal can raise them only up to the level it keeps. To demolish it altogether you type DEMOLISH in the box.
The military buildings
| Building | Plot | Top level | Requires | Level 1 price |
|---|---|---|---|---|
| Arsenal | Land plot | No limit | Town Hall 8, Metallurgy, Precision Mechanics | 160 Iron · 300 Wood |
| Barracks | Land plot | No limit | Town Hall 2 | 100 Stone · 150 Wood |
| City Wall | Fortification gate | No limit | Town Hall 3 | 180 Stone · 120 Wood |
| Hideout | Land plot | No limit | Town Hall 6, Surveying | 180 Stone · 90 Wood |
| Port | Trading harbour | No limit | Town Hall 2 | 60 Stone · 180 Wood |
| Siege Workshop | Land plot | No limit | Town Hall 4, Mechanics | 180 Stone · 260 Wood |
| War Harbour | War harbour | No limit | Town Hall 6, Harbour Engineering | 320 Stone · 240 Wood |
The figures come from the game's own content.
Which one first?
| If you want | Raise |
|---|---|
| Better units | Barracks — units unlock by level |
| To breach a wall | Siege Workshop |
| A campaign overseas | Port — transport ships; War Harbour — boarding |
| To strengthen the army you have | Arsenal |
| To survive a long siege | Arsenal and Siege Workshop |
The workshop's window
The Barracks, the Siege Workshop, the Port, the War Harbour and the Hideout all open the same window. The moment you give the order, the citizens the units need leave the city; if you cancel before training ends, those not yet trained come back as free citizens. The strip at the top shows your free citizens, how many units are queued, how long the queue will take and how fast the building works; in the Hideout it shows how many spies there is room for instead of a speed. Under the strip the Port shows its fleet, and the Hideout shows its spies and the missions under way. Then come the batches being made: the first one is working, the others wait their turn. Units are grouped by the line they stand in, and each group runs from the weakest to the strongest. The order follows the sum of a unit's attack, defence and hit points; it does not say what a unit is good for, which Units explains. Of two units with nearly the same sum, the one that opens earlier comes first. You will see the headings Front line, Flank, Ranged line and Support in the Barracks, Siege line, Support and Carriers in the Siege Workshop, and Screen and Line in the War Harbour; the Port and the Hideout make only one kind of unit, so they have no headings. Each unit's row gives the price of one, the citizens it takes and its time; the i beside its name opens, right in the row, what the unit is and what it costs to keep an hour. How many of the unit the city has stands right beside its name, a zero if it has none. The line under it splits that number into those in the city and those away, and adds any still in training or being built: soldiers on a march, standing in another city or coming home, ships at sea and spies on a mission all count as away. You choose a number by sliding or by typing; Most puts in the highest number you can pay for right now, and when a row stops somewhere, the line under it says what has run out. The moment you choose some of one unit, the other rows' ceilings are worked out again with what your choice will spend in goods and citizens taken off; even when your choice goes over your budget, the other rows do not go back to the whole of it. A unit you cannot start even one of has no slider; its row says why instead: a good the city has none of, and that it must be brought in when your island has no deposit of it, how much of what is short for one, or that no citizen is free. The total price of what you have chosen, how long it takes, how many citizens it uses and its upkeep an hour add up at the foot of the window, beside the button. Units not yet open wait under a single line; open it to see which level and which research each one needs. When no unit is open at this level, the window says so and that line comes open. Upgrading, lowering or demolishing the building is at the very bottom of the window: the upgrade's price shows how much of what is short, its requirements show which are met and which are not, and What does it bring? opens what the next level gives this building. Production goes on while the building is being upgraded.
You can cancel a batch with the × beside it, whether it is being trained or still waiting. The units already finished stay yours and the citizens set aside for that batch are free again. Most of the materials you paid for the units not yet trained come back; the rest is lost. What comes back goes into the store, where raiders can reach it like anything else, and whatever does not fit is lost. The game asks once before it cancels and shows you then how much will come back.
A workshop is not upgraded while it produces
A building that makes units does not do two jobs at once. While the Barracks, the Siege Workshop, the Port, the War Harbour or the Hideout has production running or waiting, that building cannot be upgraded. While it is being upgraded, or its upgrade waits in the construction queue, it starts no production either. Building another of the same kind counts too: no second Port goes up beside a Port that is making ships.
There are two ways to clear the way: wait for the production to finish, or cancel the batches in its queue. The building's window says what stands in the way and shuts the button. Other buildings are not affected: while the Barracks trains soldiers, you can upgrade the Town Hall or the Siege Workshop.
Where what is trained goes
While a workshop is working, the city map shows above it what it is making, how many are ready and when its queue will be done; press that and the workshop opens.
A workshop makes units and lets them go; what is trained waits in the city. To see it, send it to another city or march it out, you go to the Army page. To send goods with a transport galley to one of your own cities, you press Send goods in the Port's window; the same order is also on the Goods tab of the New order window on the Army page. To send goods to another player, you go to the island, press that player's city and choose Send resources. To move galleys to another of your cities, click that city and choose Send a fleet.
The figures come from the game's own content. Balance updates can move some numbers; the rules themselves are as written here.