
Palace and Governor's Residence
Your empire's administration: colonies and your form of government.
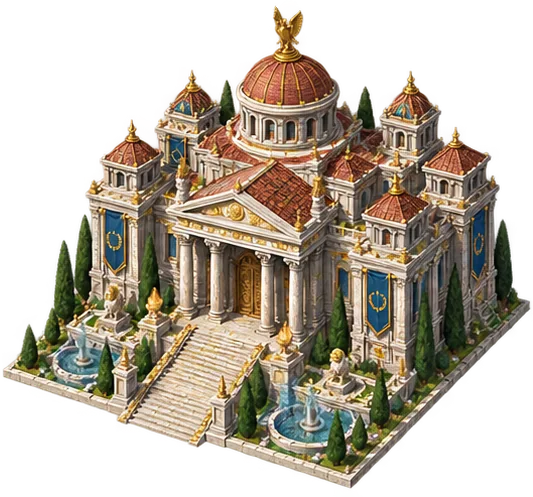
Two buildings, two kinds of city
The Palace stands only in the capital, the Governor's Residence only in colonies. Your capital is your first city; every city you found afterwards is a colony.
Both stand on ordinary land; the Palace tops out at level 15 and the Governor's Residence at level 10.
How many colonies?
Your completed Palace level IS the number of colonies you may hold: Palace 1 permits one, Palace 15 permits fifteen. An expedition on its way also holds a right until it lands: with Palace 4, three colonies and one expedition at sea, you cannot send another until it lands or the Palace rises.
The capital is not a colony: a player with only their founding city has founded none.
The Palace window
Clicking the Palace opens a window that starts with your colonies: how many you have founded and how many the Palace allows, the capital's Palace level, and every colony's Governor's Residence against the level the next colony needs. The last row of the list is the next colony right; it says when the right is free, and otherwise which level the Palace has to reach.
Below it stand the founding cost and Found a colony. If you cannot found a colony, the window says why and exactly what is short. The button opens the world map; you found the colony from there, by choosing an empty plot on an island.
The Form of government row shows the form in force and how many hours of Government Chaos a change brings; Choose or Change opens the government window. The building block at the bottom of the window says which colony the next level opens. The Palace can be lowered by a level and the colonies you have founded stay yours, but the Palace cannot be demolished.
Expansion is learned first
To build the Palace at all, the Town Hall in your capital must stand at level 2 or higher. The Palace's first two levels also want a research each, on top of stone and wood: Organised Labour for the first level, Standard Measures for the second. The road to a first colony therefore runs through the Academy.
The reason is that governing one city and governing two are not the same work. The second wants a shared measure, a shared record and an order that reaches beyond your own walls.
From its third level onwards the Palace asks for no new research: those two are all the research it ever wants. The Governor's Residence asks for none at any level. Whatever a level will want, you see it in the upgrade window before you spend anything on it; the window ticks what is met and names what is missing.
The first two colonies are priced differently
For your first and second colonies the founding cost is Gold and nothing else. They want no Marble, Grapes or Iron, and you need no market for them. The reason is the map: whichever island the world put you on produces only one of the three special resources, and the first step of expansion should not depend on the ground you happen to be standing on. The Wood and Stone you send with the settlers are not part of the cost; they are the new city's first stores.
From the third colony it changes. The founding cost now asks for Marble, Grapes and Iron as well as Gold, the Palace must stand higher, and the Gold jumps. What your own island does not dig you bring from one of your colonies or buy at the market. The first two colonies are a beginning; the third is a decision.
Your form of government
Government belongs to the PLAYER, not the city: you choose one form and the whole empire is governed by it.
Each form is a set of effects — one raises Knowledge and happiness while slowing recruitment, another does the reverse. The first choice is free.
You choose the form in the government window, opened from the Palace. On the left every form stands with its picture and how many gains and costs it brings; the form in force is marked Now. Press a form and its large picture, what it brings and what it costs appear on the right; pressing only looks and changes nothing. The foot of the window says what the choice means: the first choice is free and takes effect as soon as you press the button. For a change it says which form you leave and how many hours the chaos lasts; pressing the button then asks once more what you will lose, armies in the field included. During the chaos the window shows the form waiting next and how long is left; meanwhile the form cannot change.
Once you press the button, the foot of the window says what happened. On a first choice the form is in force at once: no chaos begins and no army in the field is called home. On a change you read that the chaos has begun, how long is left, what is shut in the meantime and which form comes after it. All three moments reach the bell and stay in Activity: the first choice, the chaos a change begins, and the chaos ending with the new form in force. The last one comes hours later, whether or not you are playing; pressing it opens the Palace in your capital.
The Residence, and the brake on expansion
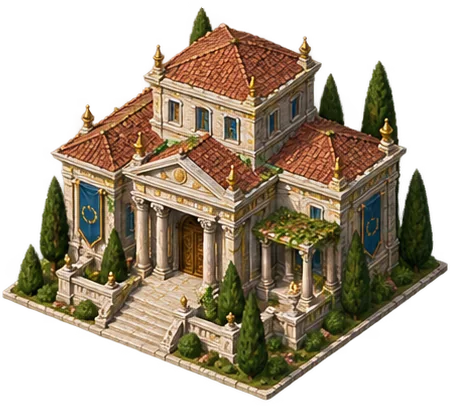 Governor's Residence
Founding a colony wants three things at once: a high enough Palace in the capital, the colony's founding cost, and a high enough Governor's Residence in EVERY colony you already hold.
The third is the one people miss: founding a fourth colony means having raised the Residence to level 4 in all three you already have. Expansion is a combined bill. The Residence tops out at level ten, so from the tenth colony on the level asked of it stays at ten.
The Governor's Residence window
Clicking the Governor's Residence in a colony opens a window that starts with the next colony: which number it is, whether the way is open, and the level every colony's residence must have reached. Below that your colonies are listed one by one; each shows its residence level beside the level needed, a colony that has reached it is ticked, and the city you opened the window in is marked "this city". Under the list stands the capital's Palace level. Clicking a city's name takes you there.
If the way is closed, the short note beside the heading says why: how many residences are behind, that the Palace is not high enough, or that the founding cost is short. You do not found the colony from this window; you choose an empty plot on an island on the map.
The building block at the bottom of the window shows how far the next level brings this residence towards the next colony's requirement; a level that is rising counts once the work is done. The Governor's Residence can be lowered by a level and the colonies you have founded stay yours, but if the residence drops below the level needed, the next colony waits. The residence cannot go below its first level, so it cannot be demolished.
A colony is a voyage
Clicking an empty plot on an island opens the colony window. At the top it shows where the expedition sails from and to. When every condition is met the window says so in one line, and you can open the list if you want it; when one is not, the list stays open with the missing condition first. Each item of the founding cost has its own box, and a box that is short says by how much. If a colony cannot be founded, the window still opens and says what is missing.
When the conditions are met you name the colony, load the expedition and press Start the expedition. While the button is off, the sentence beside it names the first thing still missing: a condition, an item of the cost, the minimum cargo or the colony's name. The name begins and ends with a letter or digit, and may have spaces, apostrophes or hyphens between. The window tells you while you are still typing if a name will not do. No city appears then: a fleet sets out carrying the settlers and the stores the new city will open with. The city is founded when that fleet arrives and the ground is still empty.
By ship, the expedition is an ordinary transport voyage: the departing city needs a Port and enough transport ships. The ships carry the cargo, set the settlers down and come home, whether the expedition succeeds or not. Nothing arrives instantly — even a plot on your own island is a crossing, and another island means open sea and a longer one. If the plot is on the same island as your capital, load carts can carry the settlers' cargo instead of ships: when carts stand idle, the window offers a Carrier choice with the number idle under each option. Carts take the land road; they need no Port and set out the moment you give the order. A plot on another island can only be reached by ship, as carts cannot cross the sea. No cart leaves a capital that is being fought over or held by someone else. Once the settlers are set down, the carts come home like ships and cannot be used for anything else until they do.
By ship, the cargo is first loaded aboard at the capital's Port, and only then does the expedition put to sea. How long loading takes depends on the size of the cargo and the Port's level; if the Port is busy loading another shipment, the expedition waits its turn. The window shows how many ships go, the Port loading, the journey and the estimated arrival separately; the world's speed applies to all of them. By cart there is no loading and no queue, and the window does not draw the loading box.
The cost and the cargo are separate bills
| Bill | Founding cost | Colony's cargo |
|---|---|---|
| What | Gold; from the third colony also Marble, Grapes and Iron | At least Wood and Stone; any resource while there is room |
| For what | Permission to found another city | The new city's first stores |
| Taken from | Gold from the treasury, materials from the capital's store | The capital's store |
| Taken when | When the settlers arrive | The moment you press Start the expedition |
| What becomes of it | Spent; it never reaches the colony | Goes into the colony; comes home if the expedition fails |
The expedition's cargo
| Resource | Minimum |
|---|---|
| Stone | 90 |
| Wood | 150 |
| The new city's whole store | 9000 |
The window fills in the minimum cargo for you; anything beyond it is optional. Each line shows the minimum, what your capital holds, and beside your choice the most you can take; you set it with the slider, with − and +, by typing the figure, or with What fits. The whole cargo must fit in the new city's empty store, and that store is shared by every resource: the bar above the lines shows how full it is, and loading more of one leaves less room for the others. The cargo also cannot exceed what your idle ships can carry or what your capital holds; when a line will take no more for that reason, the reason is written under it. From the third colony the materials of the founding cost must be waiting in the store alongside the cargo.
What happens on arrival?
If the settlers find the ground empty, the city is founded and the founding cost is paid there and then. Their cargo goes into the new city's store, and the Governor's Residence is already standing; you do not have to build it.
The new city is given nothing else. The starter package a founding city receives is never handed to a colony a second time — what the settlers carry IS that package.
Because the cost is paid on arrival, the conditions are checked again on arrival. If you spend the treasury, or the materials the cost asks for, on something else while the fleet is at sea, the settlers reach the ground but cannot found the colony, and turn back with their cargo. That is why the settlers' line in On the Road shows the cost due on arrival. With several expeditions at sea, each one's cost is shown as though those arriving before it found their colonies and pay for them.
Why found a colony?
More plots — each city brings its own. More building — the build queue is per city. Different deposits, more population, more tax.
In exchange every colony starts from a Town Hall and wants its own Warehouse, Tavern and defence. A colony you cannot defend is a liability.
The figures come from the game's own content. Balance updates can move some numbers; the rules themselves are as written here.