
Walls and Siege
You cannot take a walled city with a wall still standing unless you brought siege engines.
What a wall does
A City Wall is not a unit: it recruits nobody, eats no citizens, and stands there being hit.
While the wall stands, the city is shut: nobody walks in and nobody walks out to fight. Foot soldiers and horsemen outside cannot march on the men inside, and the foot and horse inside do not come out of the gate to strike. Only arrows shot over the wall reach the men behind it, and the wall lets very little of them through. The garrison's fire in turn finds whoever is nearest the wall: first the attacker's front line, then his flank; the ranged line behind is not hit while those in front of it stand. Only the men on the battlements shoot at the engines at the foot. The wall takes damage itself: it has integrity and resistance, and resistance decides how much of each blow reaches the stone.
Both integrity and resistance rise with the wall's level.
The rule is the same for both sides; the table below says who does what.
Garrison limit
The number of defending units that can stand behind a wall has a limit. Every level of the Town Hall and of the City Wall raises it; the Garrison line in the Town Hall window gives it. Units are counted, not their size: a Helepolis counts as one unit, like a hoplite.
If the defence starts a round larger than this limit, it fights that round in the open as if there were no wall: the wall covers nobody and takes no damage that round. Once losses bring the defence under the limit, the wall is back in the fight. The battle report marks these rounds. The limit worked out when the siege opens stays the same for the whole battle. Harbours have no wall, so a sea battle has no such limit.
The wall
Archers shoot over the wall and siege engines strike the stone; everybody else waits on either side of it.
Who does what while the wall stands?
While the wall stands, hand-to-hand fighting has no way across in either direction. Fire does get across, but not everybody's. How a siege runs round by round is in Examples.
At a glance
| Who | While the wall stands |
|---|---|
| The attacker's foot and flank | Wait before the wall. They can reach nobody, but the defender's fire finds them: first the front line, then the flank. |
| The attacker's slingers | Wait. They cannot shoot over the wall; standing in the ranged line, they become the target of the defender's fire once the front line and flank before them have fallen. |
| The attacker's archers (Archer, Cretan Archer) | Shoot over the wall, and only at the men on the battlements and the ranged line behind them. A very small share of each shot arrives. |
| The attacker's shooting engines | Strike the wall from its foot, like the rams; only the men on the battlements shoot at them. |
| The attacker's Battering Rams and Chelone | Strike the wall from its foot. They never strike a man. |
| The defender's foot and flank | Wait behind the wall. They do not come out to strike, and nobody can reach them. |
| The defender's archers and slingers | Shoot out at full strength and hit whoever is nearest the wall: the attacker's front line, his flank, and last the ranged line behind; only the men on the battlements shoot at the engines at the foot. Arrows beyond what it takes to finish a line go on to the next. Those on the battlements hit a little harder for the height. |
| The defender's shooting engines | Shoot out in the same order as the archers and leave the engines at the foot alone. |
| The defender's Battering Rams and Chelone | Stay at home. They do not take the field, cannot be hit, and take no part in the defence. |
The breach
The wall is breached on the round its integrity reaches nothing. The cover holds for the whole of that round — everyone fights from the start-of-round battlefield.
From the next round the cover ends and the wall phase is over: every line fights as on an open field, the flank included. A breach lifts the attacker's morale and hits the defender's hard.
A wall never repairs itself during a battle. The breach stays open until that battle ends; the next battle begins with the gate whole. A new wall level finished while a battle is being fought does not join it: the battle goes on with the wall it began with.
The battlements
The battlements are where archers shoot from on top of the wall. While the wall stands you can send some of your ranged units up there; melee troops and siege engines cannot go. The room up there grows with the wall's level and comes on top of the battlefield: a man on the battlements takes no room in the ranged line, so archers who would otherwise wait in reserve for want of room get to fight.
Shooting from height, the men up there hit a little harder. The price is upkeep: a man on the battlements costs his upkeep times a multiplier, every hour, at war or not. You choose who goes up in the City Wall's window, with a slider for each kind of ranged unit. Each slider goes as far as the men in the city and the room left up there.
The men on the battlements count as in the line: they shoot, they are shot at, and they spend their arrows. Each round, whoever falls up there is replaced from the same unit: as long as enough of that unit is left in the city, the battlements stay manned at the number you chose. From the round after a breach there are no battlements; the men come down unharmed and fight on in their own line or wait in reserve. If the unit drops below the number you chose, through a march or losses, its place on the battlements shrinks with it by itself; lower or demolish the wall and whoever no longer fits comes down.
You cannot assign an ally's troops stationed in your city to the battlements, but in a battle they fill whatever room your own choice leaves by themselves, and the height works for them too. In a battle for an occupied city, though, neither the wall nor the battlements are used. The battle report shows, round by round, who fought from the battlements.
Room on the battlements
| Wall level | Room on the battlements |
|---|---|
| 1 | 4 |
| 5 | 20 |
| 10 | 40 |
| 15 | 60 |
| 20 | 80 |
| 25 | 100 |
| 30 | 120 |
| Attack of a man up there | +10% |
| Upkeep of a man up there | ×1.5 |
The table shows how much room, counted in citizens, the battlements have at each wall level; below it, what the height adds to a posted man's attack and what his upkeep is multiplied by. A siege goes on with the battlements it began with: a wall raised during the battle does not make them bigger. The table stops somewhere, the wall does not: it has no last level, and the room on the battlements keeps growing by the same amount with every level.
The foot of the wall
Every siege engine — the Battering Ram and the Chelone, the Catapult and the Oxybeles alike — works at the foot of the wall while it stands; they differ only in strength. There they are the target of the archers on the battlements: a share of the battlements' fire turns on them. Archers behind the wall who are not on the battlements cannot see the foot, and if nobody is on the battlements, nobody fires at it.
So the battlements slow a ram train but do not stop it. A train big enough gets through; a few rams on their own are meat for the archers up there. Having your own archers shoot over the wall and silence the battlements first helps the rams. The Chelone's roof turns arrows aside: the same fire does far less harm to it.
Engine against engine
A shooting engine looks for the enemy's engines first. The Oxybeles in your city turns on the besieger's Catapult before it turns on the front line, and two shooting engines of the same cost take each other out about evenly. While the wall stands this does not happen: the besieger's engines are at its foot, the work of the men on the battlements alone, and the engines inside fire on the next line.
A ram cannot answer back. Once the wall is down, a ram on the field is nothing but a target for the engines: it still strikes no man, but now it can be struck.
Siege engines
| Unit | Lane | Attack | Defence | Against a wall | Citizens | Building | Research | Ammunition |
|---|---|---|---|---|---|---|---|---|
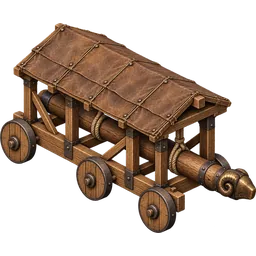 Battering Ram | Siege line | 100 | 90 | 90 | 4 | Siege Workshop lv. 1 | Siegecraft | — |
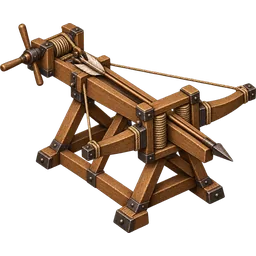 Oxybeles | Siege line | 180 | 45 | 45 | 2 | Siege Workshop lv. 5 | Torsion Engineering | Bolts × 18 |
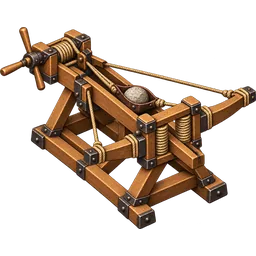 Stone Thrower | Siege line | 160 | 70 | 80 | 3 | Siege Workshop lv. 10 | Torsion Engineering | Stones × 15 |
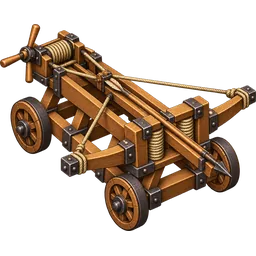 Ballista | Siege line | 205 | 65 | 61 | 3 | Siege Workshop lv. 15 | Advanced Torsion | Bolts × 15 |
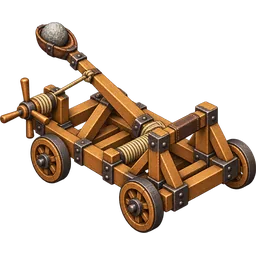 Catapult | Siege line | 230 | 90 | 161 | 4 | Siege Workshop lv. 21 | Heavy Siege Engines | Stones × 12 |
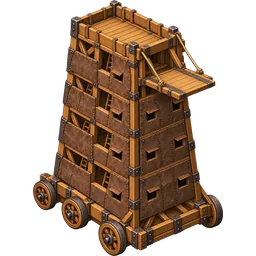 Helepolis | Siege line | 260 | 170 | 247 | 8 | Siege Workshop lv. 28 | Advanced Siege Engineering | Stones × 24 |
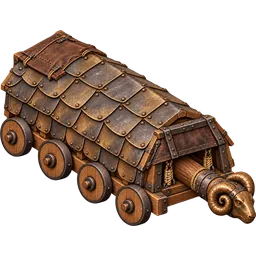 Chelone | Siege line | 660 | 300 | 6600 | 6 | Siege Workshop lv. 30 | Covered Rams | — |
Bolt-throwers are for targets on the field; stone-throwers and the ram are for the wall. A high attack does not make an engine good against a wall: the Ballista hits almost as hard as the Catapult but does next to nothing to stone. The Battering Ram spends no ammunition: however long the siege runs, it never dries up. It strikes only the wall, never a man, and takes no part in a defence: a ram waiting in your city does not take the field against those who attack it. The heavy engines are far more destructive, but they cost far more — in citizens, and in room on the narrow siege line.
High walls and the Chelone
CheloneEach wall level makes the wall a good deal stronger than the last, while the siege line only widens as the Town Hall grows. That is why the highest walls hold out even against the Helepolis: the attacking army breaks under the arrows before the stone gives way.
The Chelone exists to bring those walls down. It is a heavy ram slung beneath a wheeled shed with a plated roof: it batters the gate far harder than any other engine and spends no ammunition. Its roof and thick plating let it stand up to arrows longer than any other engine, and the archers on the battlements do it far less harm than they would a plain ram.
It costs accordingly. It needs a very high level of the Siege Workshop and the Covered Rams research; it is expensive, costs many citizens, has heavy upkeep, is the slowest unit in the army and fills a transport ship on its own. It opens the breach, but it does not take the city: if a garrison that is a match for the attacker stands behind the wall, the fight stays hard after the breach.
What does a siege engine aim at?
The wall first, and only the wall while it stands. With no wall, or once it has fallen, an engine looks for the enemy's own siege engines first — against which it is more effective still — then the front line, the flank and the ranged line. The Battering Ram and the Chelone look for none of these: they strike the wall only. No engine can reach the support column.
How many engines?
There is no fixed number: the wall's level, its resistance and the kind of engine decide it. But three things are always true.
The siege line is the narrowest part of the ground, and an engine that does not fit does nothing at all. Engines eat stones. And engines break: an engine that is smashed never fires again in that battle. If you brought engineers, they haul some of the broken ones back to be mended, and your army takes them home when it leaves.
The figures come from the game's own content. Balance updates can move some numbers; the rules themselves are as written here.